| Add a care recipient |
|---|
|
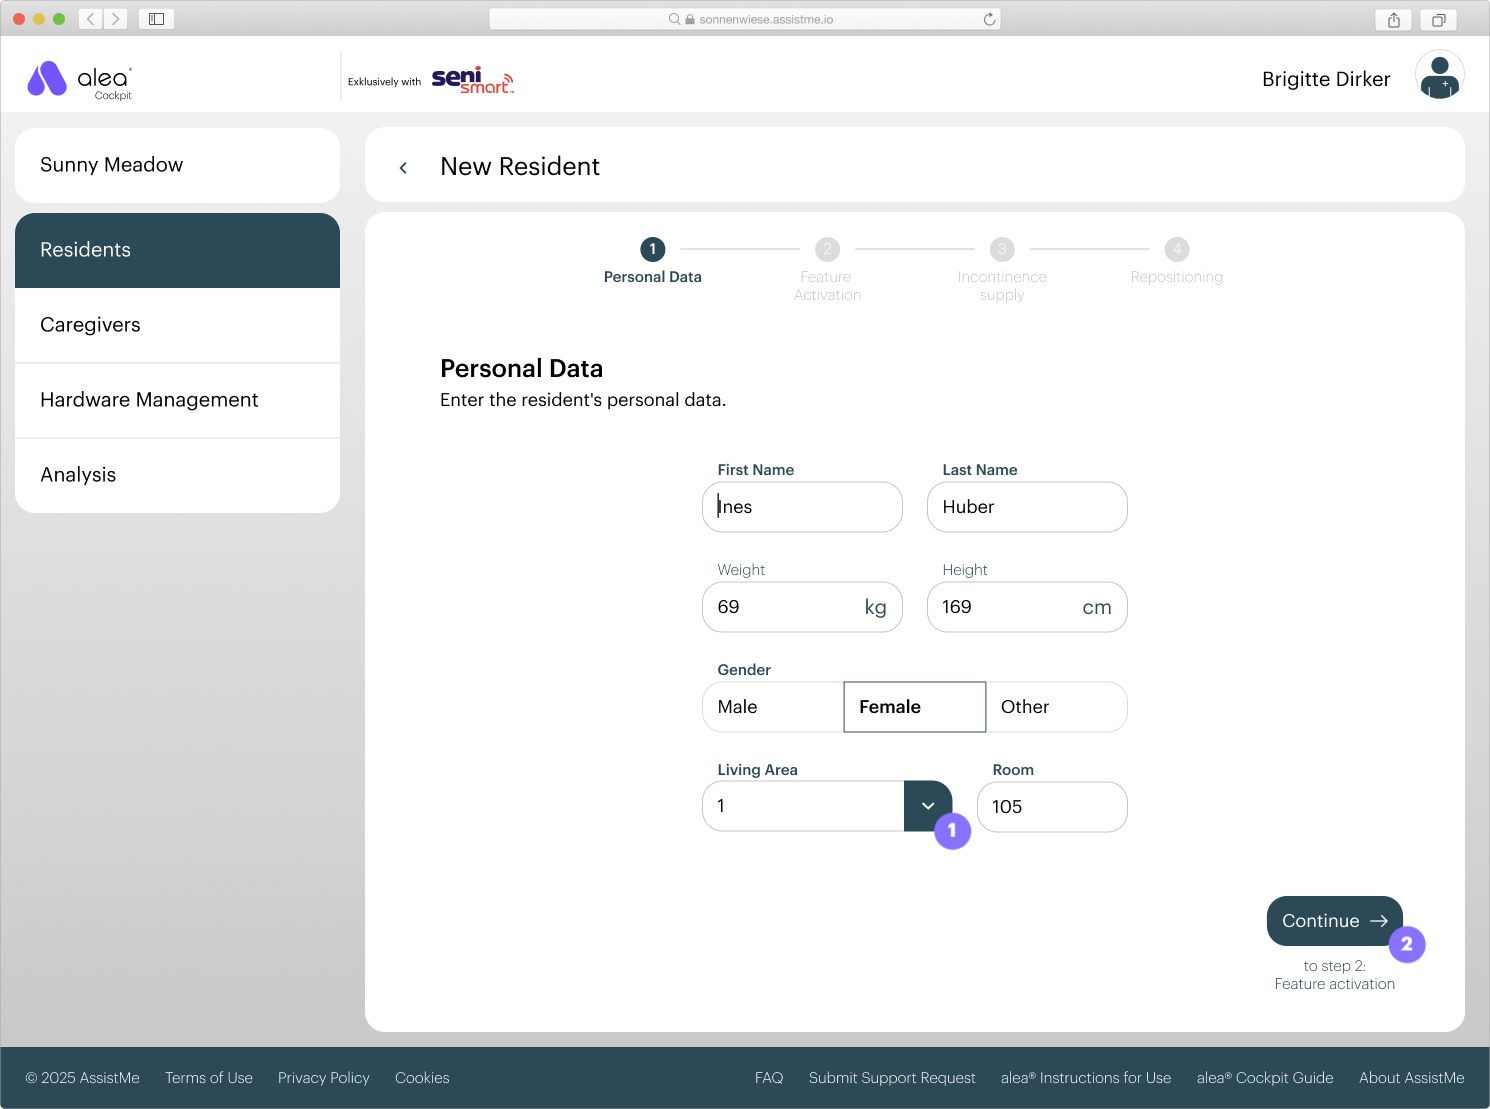
Schritt 1 von 6 |
|
|
|
Step 2 of 6 |
|
|
|
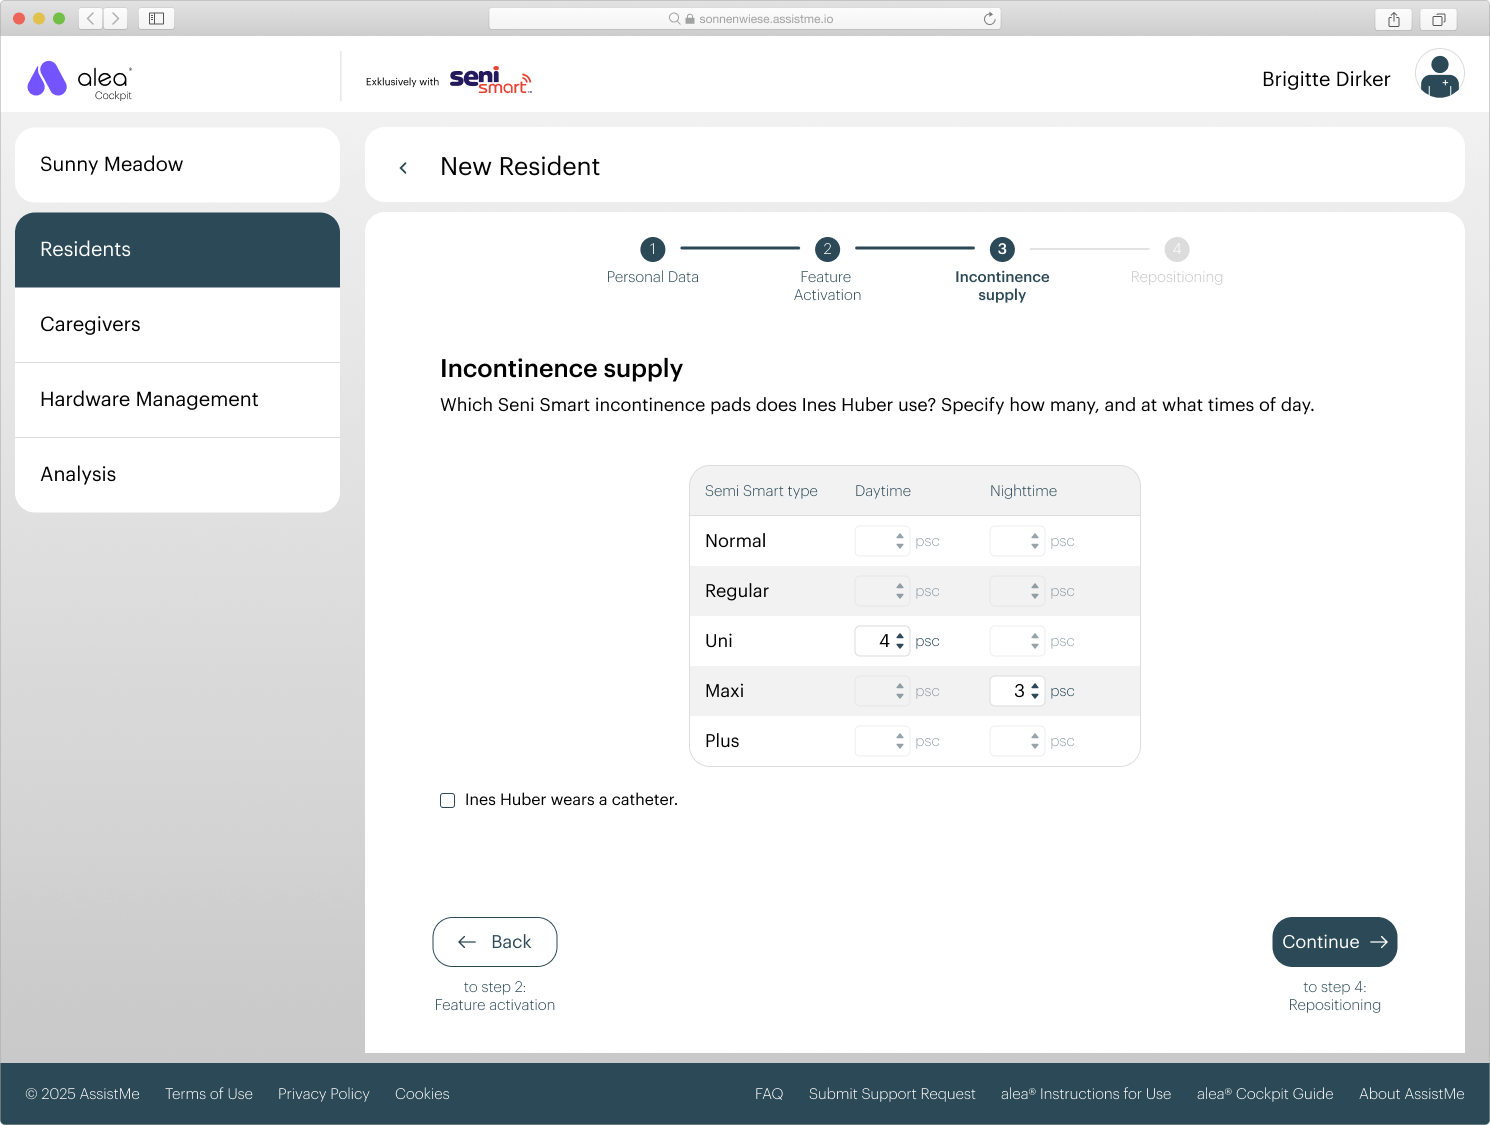
Step 3 of 6 |
|
|
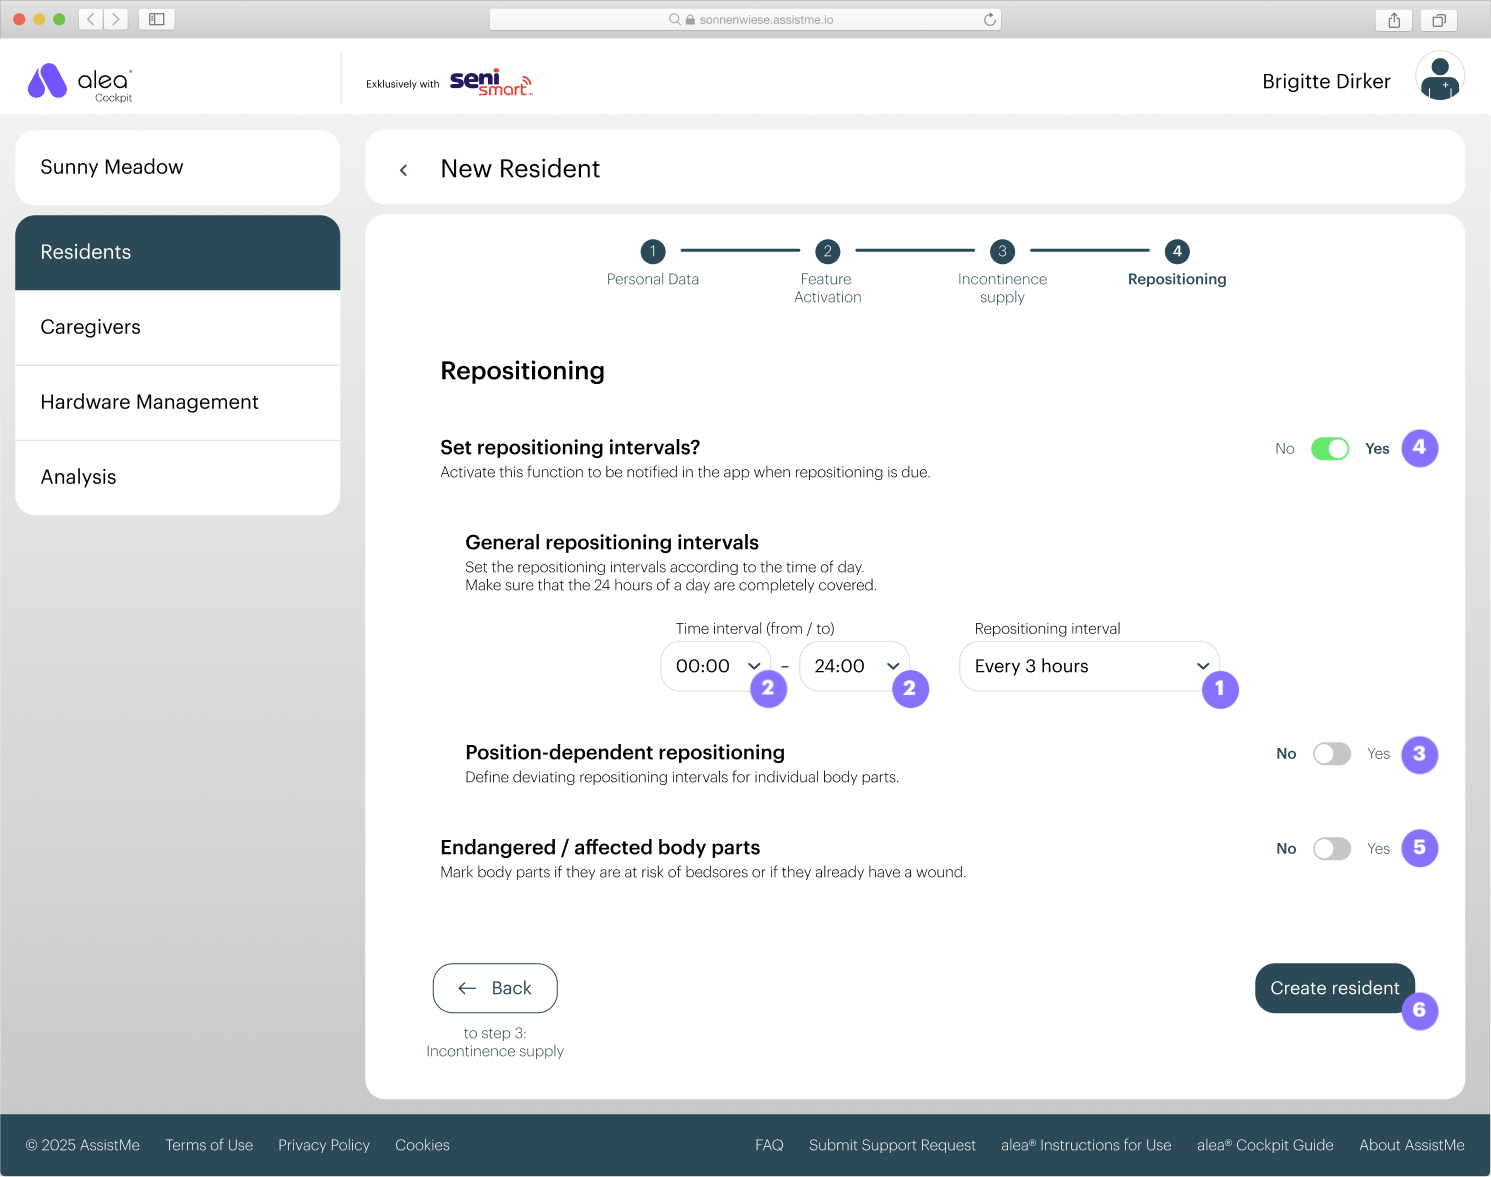
Step 4 of 6 |
|
|
|
Step 5 of 6 |
|
|
Step 6 of 6 |
|
|
English
| Add a care recipient |
|---|
|
Schritt 1 von 6 |
|
|
|
Step 2 of 6 |
|
|
|
Step 3 of 6 |
|
|
Step 4 of 6 |
|
|
|
Step 5 of 6 |
|
|
Step 6 of 6 |
|
|